25 Christmas Crafts for Adults to Make at Home
Christmas crafts for adults can be simple, useful, and lovely enough to leave on display all season. A few ribbon scraps, some paper, or a little paint can become something you’ll enjoy making, and actually want to keep.
From handmade ornaments to thoughtful gift details, these ideas bring a personal touch to the holidays. Choose one that suits your supplies, clear a corner of the table, and let the Christmas playlist handle the atmosphere.
Before You Start
Check what you already have before buying supplies. Cardboard packaging, leftover yarn, fabric scraps, and last year’s ribbon can work beautifully.
A basic kit of scissors, a ruler, craft glue, a pencil, and paintbrushes will cover several projects below. Follow the drying instructions for your materials, and protect your table before painting or gluing.
For a coordinated look, choose two or three colors to repeat throughout your projects. Cream, burgundy, and evergreen make a classic combination; navy, white, and silver offer a cooler alternative.
If you enjoy making seasonal decorations, save our Easter crafts for adults for your next holiday project.
1. Velvet Ribbon Ornaments

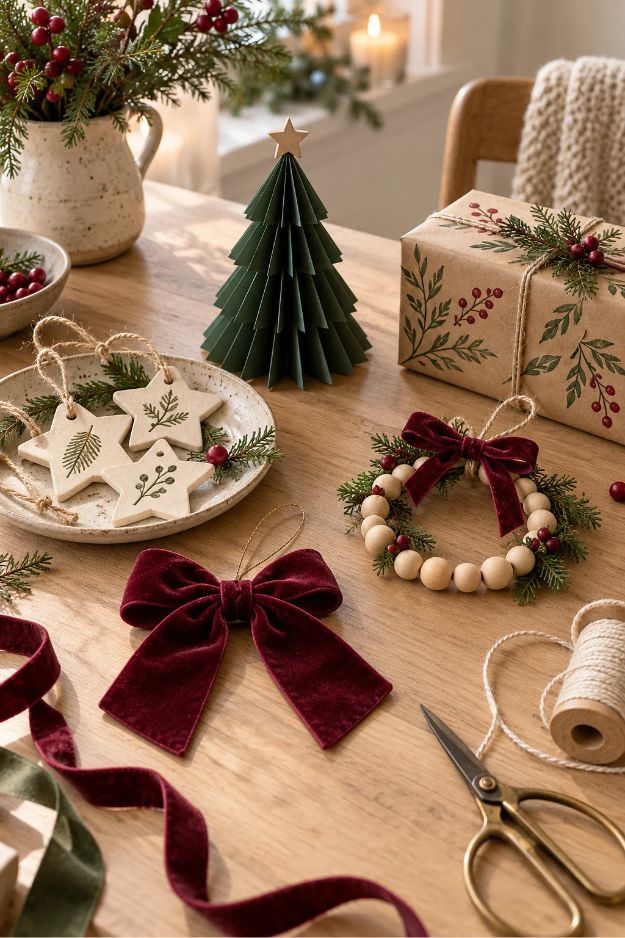
Velvet bows bring softness to a Christmas tree without needing much decoration around them. Burgundy looks especially rich against green branches, while dusty blue works beautifully with silver ornaments.
You’ll need: Velvet ribbon, scissors, thin craft wire, and ornament hooks.
Tie a bow, adjust the loops until they look balanced, and trim the tails. Wrap craft wire around the center at the back, tuck in the sharp ends, and attach an ornament hook.
Make a small set in the same color and spread them around the tree. Consistent ribbon widths help the finished collection feel intentional.
2. Stamped Clay Gift Tags
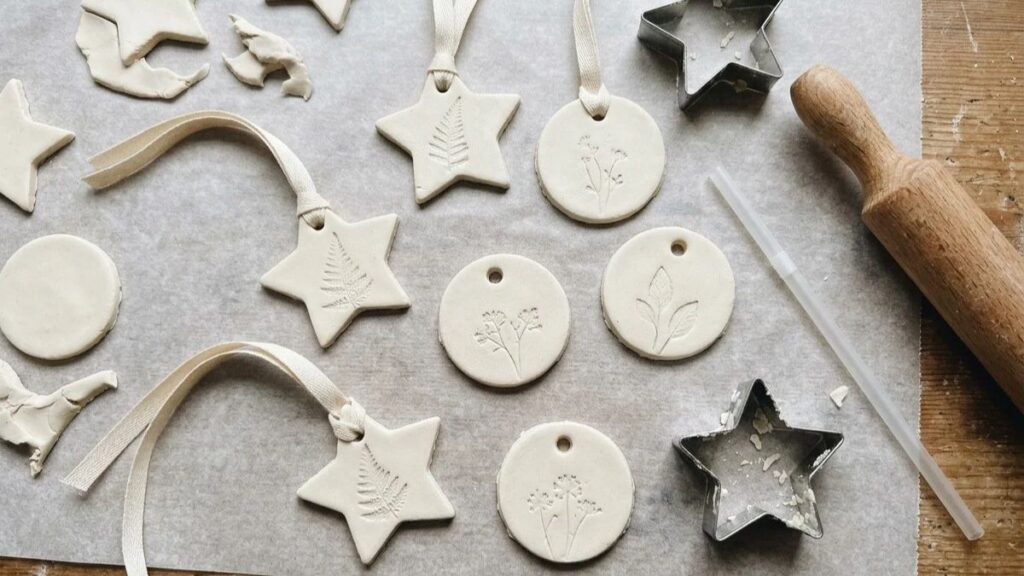
Handmade clay tags turn simple wrapping into something a little more personal. After the gift is opened, the tag can become a small tree ornament.
You’ll need: Air-dry clay, a rolling pin, cookie cutters, botanical texture stamps, a drinking straw, and ribbon.
Roll the clay evenly to about ¼ inch thick. Press a botanical stamp lightly into the surface, then cut out stars or circles. Make a hanging hole near the top, leaving enough clay around it to prevent the edge from breaking.
Let the tags dry according to the manufacturer’s instructions before threading them with ribbon. If you plan to paint or seal them, wait until they are completely dry. See Crayola’s air-dry clay guidance, which explains that sealing does not make its clay waterproof.
3. Folded Paper Christmas Trees
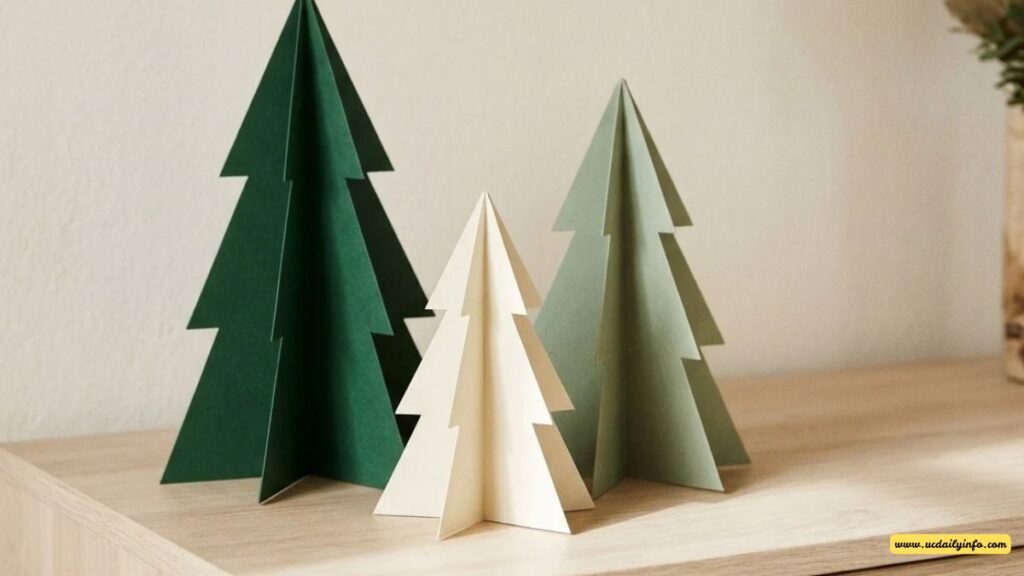
A row of paper trees makes an easy centerpiece for a shelf, sideboard, or small apartment dining table.
You’ll need: Medium-weight paper, scissors, a ruler, and glue.
Cut out a symmetrical tree shape and use it as a template for six matching pieces. Fold each tree vertically down the middle. Glue one folded half to the next, working around until the first and last halves meet.
Keep the bottom edges level so the tree stands upright. Make several heights using forest green, cream, or muted patterned paper.
4. Mini Embroidery Hoop Wreaths
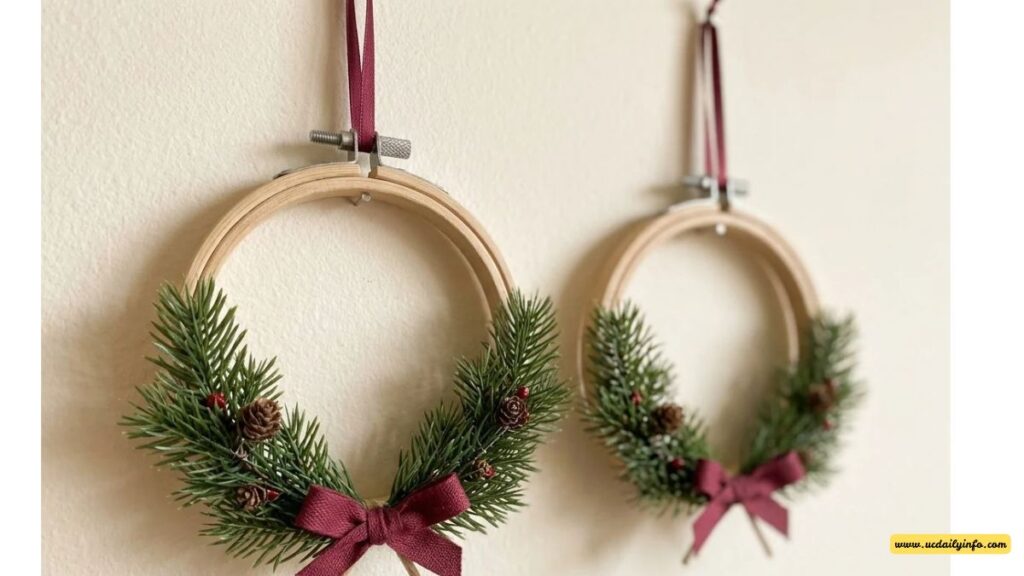
Small embroidery hoops make neat little frames for seasonal greenery. They suit an interior door, a gallery wall, or the back of a dining chair.
You’ll need: Small embroidery hoops, faux greenery, floral wire, ribbon, and wire cutters.
Arrange a few short stems along the lower third of the hoop. Wire them securely in place, covering each attachment point with the next piece of greenery.
Finish with a bow and a hanging loop. Leaving part of the wooden hoop visible keeps the design light rather than overcrowded.
5. Painted Wooden Christmas Houses
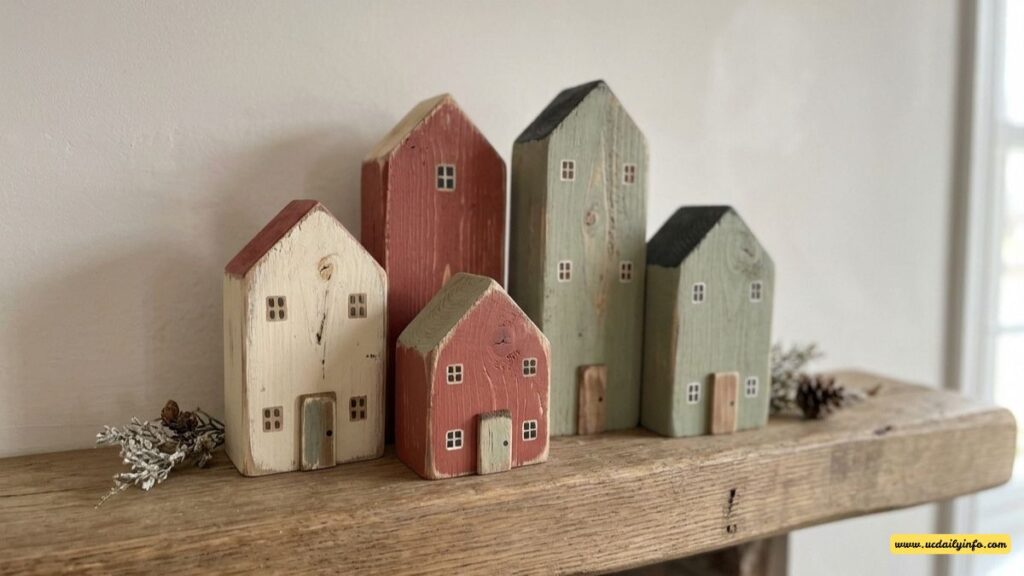
A tiny painted village brings character to a mantel without taking up much room. The houses don’t need elaborate details; a few doors and windows can do the work.
You’ll need: Unfinished wooden house shapes, acrylic paint, a fine brush, and a pencil.
Paint the houses in cream, muted red, or soft green. Once dry, lightly sketch doors and windows before adding the details with a fine brush.
Vary the roof colors and arrange the houses in a loose group. Place taller pieces toward the back so every little front door remains visible.
6. Scrap-Fabric Christmas Trees
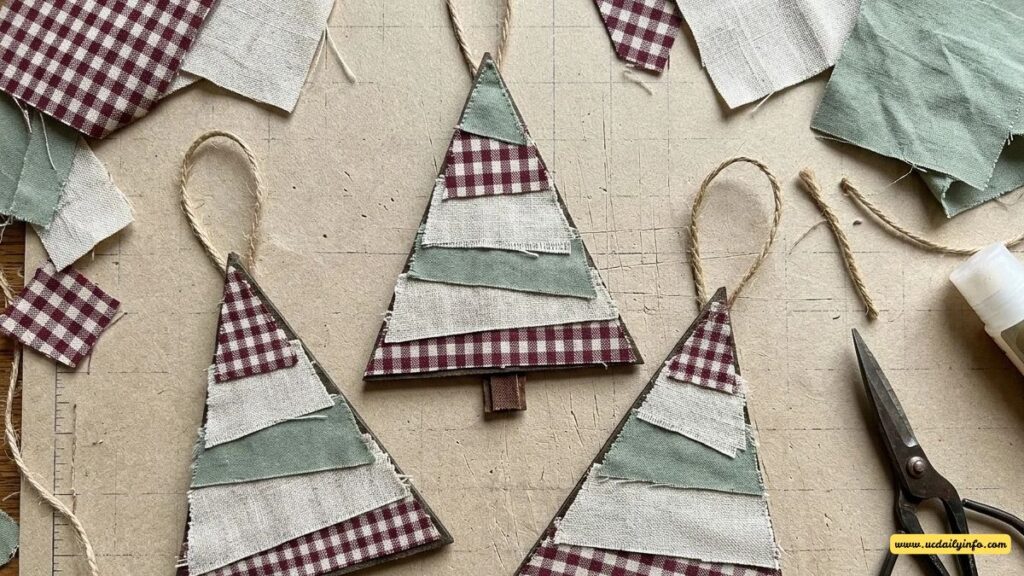
Fabric trees are a practical way to use small pieces left over from sewing projects. Gingham, linen, and subtle floral prints give each tree a different personality.
You’ll need: Fabric scraps, felt or sturdy cardboard, fabric glue, scissors, and twine.
Cut a flat tree shape from your backing material. Arrange narrow fabric strips across the front, overlapping them slightly, then glue them down.
Once dry, trim the fabric around the tree’s outline and attach a hanging loop. Mix patterns within one color family to keep the result coordinated.
7. Paper Christmas Stars
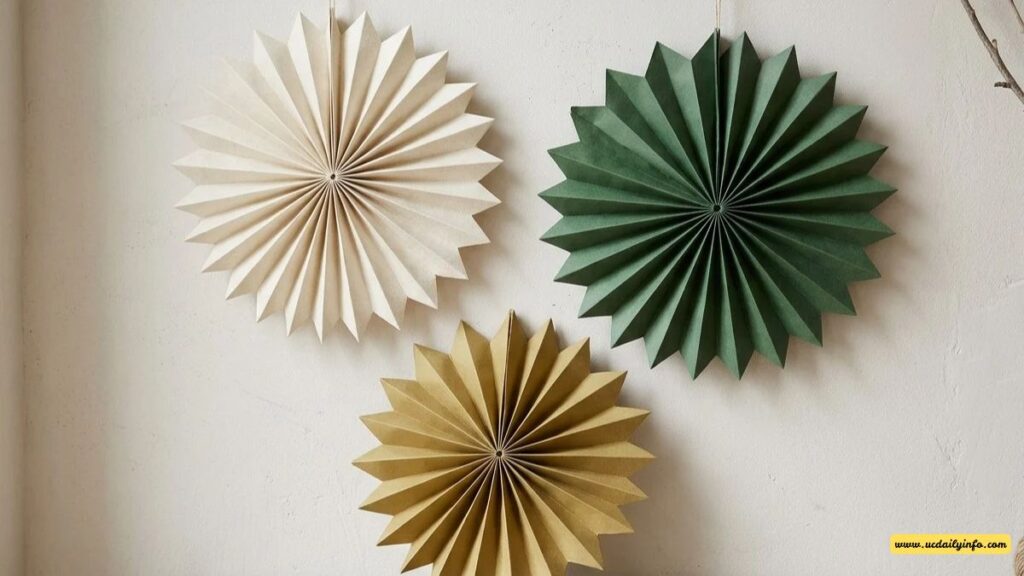
Paper stars add a festive touch to windows, shelves, or a plain wall. Using double-sided paper means they look finished from either direction.
You’ll need: Paper, a ruler, scissors, glue, a hole punch, and string.
Cut a paper strip approximately 3 inches wide and 24 inches long, joining shorter strips if necessary. Starting at a short end, make accordion folds about ½ inch wide. Continue until the entire strip forms a compact folded stack.
Fold the stack in half across its length to mark the center, then unfold it and tie thread firmly around that midpoint. Trim both ends of the stack into points. Fan out each side and glue the neighboring end panels together to form a circular, pointed rosette. Let the glue dry before attaching a hanging loop.
8. Felt Mitten Ornaments
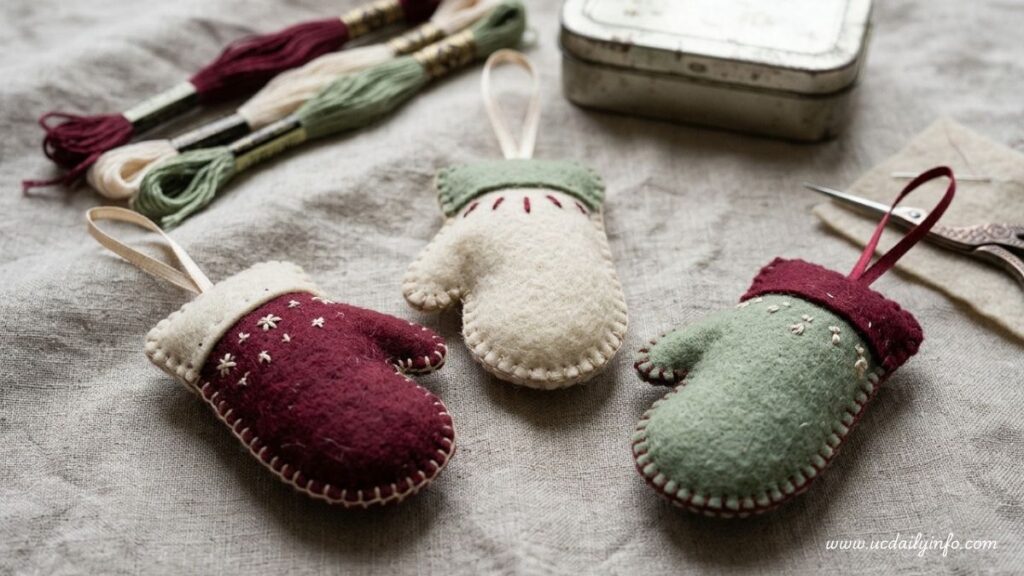
Little felt mittens bring a cozy, handmade feel to the tree. They also work as decorations tied onto gift bags.
You’ll need: Felt, embroidery floss, a needle, ribbon, and a small amount of stuffing.
Draw a simple mitten template and cut two matching pieces. Decorate the front with a stitched initial or a contrasting felt cuff.
Sew the pieces together around the edge, catching a ribbon loop inside the top seam. Add a little stuffing before closing. Keep the filling light so the mitten holds its shape without becoming bulky.
9. Mason Jar Winter Scenes
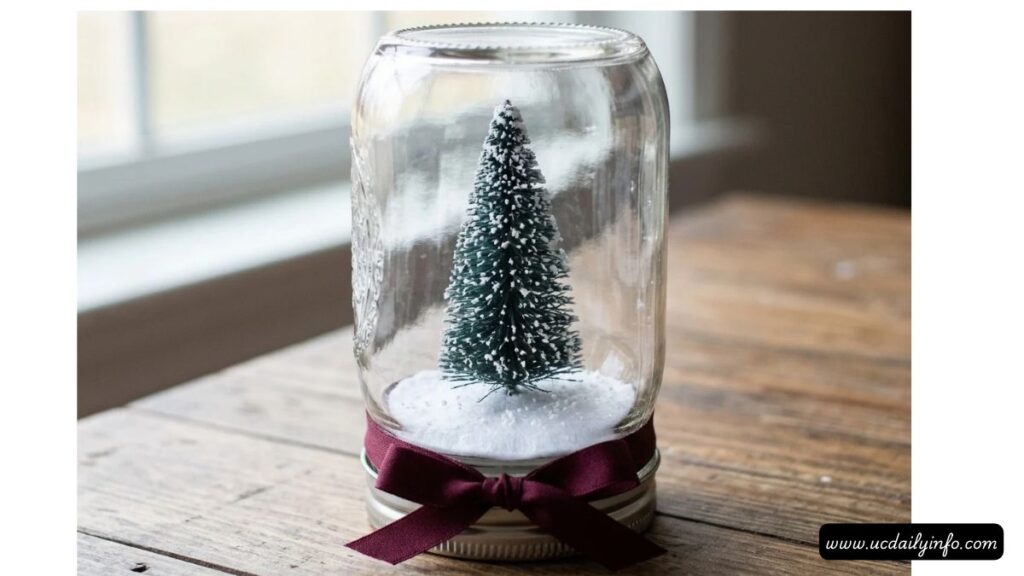
A miniature winter scene gives an empty jar a new purpose. Keeping it dry makes the project easier to assemble and store than a water-filled snow globe.
You’ll need: A clean, dry, wide-mouth jar, a miniature tree, felt, craft glue, and ribbon.
Glue a felt circle inside the lid and attach a miniature tree on top. Check that the tree fits through the jar opening and clears the glass.
Let the glue dry fully, then carefully screw the jar onto the lid with the scene inside. Tie ribbon around the base and display it on a shelf.
10. Yarn-Wrapped Cone Trees
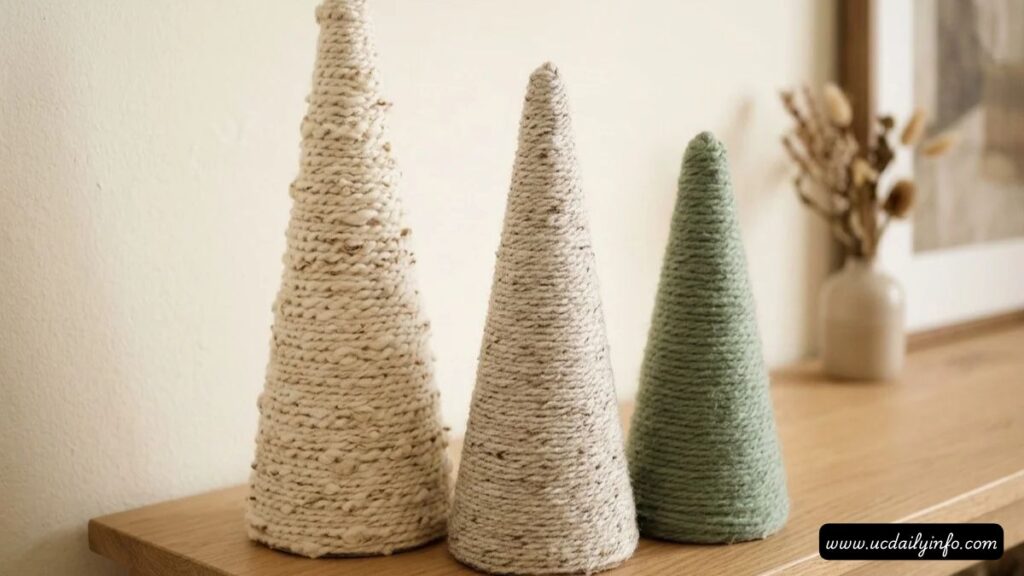
These soft little trees work especially well with neutral Christmas decorations. Different yarn textures give a group of otherwise simple shapes more interest.
You’ll need: Cardstock cones, yarn, craft glue, and scissors.
Secure the yarn at the bottom of a cone with a small dab of glue. Wrap upward in close rows, adding glue sparingly as you work.
Cover the tip neatly and tuck the end beneath the final wraps. Make three trees of different heights, using cream, oatmeal, and sage yarn for a quiet winter display.
11. Hand-Painted Gift Wrap

Plain kraft paper becomes part of the present when you decorate it yourself. Small repeated shapes are easier to manage than one complicated illustration.
You’ll need: Kraft paper, acrylic paint, a small brush or sponge, and twine.
Spread the paper flat and paint simple trees, dots, stars, or short evergreen sprigs. Leave space between motifs so the pattern doesn’t become crowded.
Let the paint dry completely before wrapping. Finish with plain twine and a handwritten tag. One paint color is often enough—the wrapping doesn’t need to compete with the Christmas tree.
For another season’s take on handmade styling, explore these Easter DIYs that look expensive.
12. Wooden Bead Mini Wreaths

Wooden bead wreaths offer a simple alternative to glittery ornaments. Leave the beads natural or paint a few for small touches of color.
You’ll need: Wooden beads, flexible craft wire, ribbon, and wire cutters.
Thread the beads onto the wire, leaving enough wire at each end to close the circle. Shape the strand into a small wreath and twist the ends securely together.
Tuck the wire ends away and cover the join with a bow. Add a ribbon loop for hanging. Check that the closure holds before placing it on a branch.
13. Holiday Card Garland
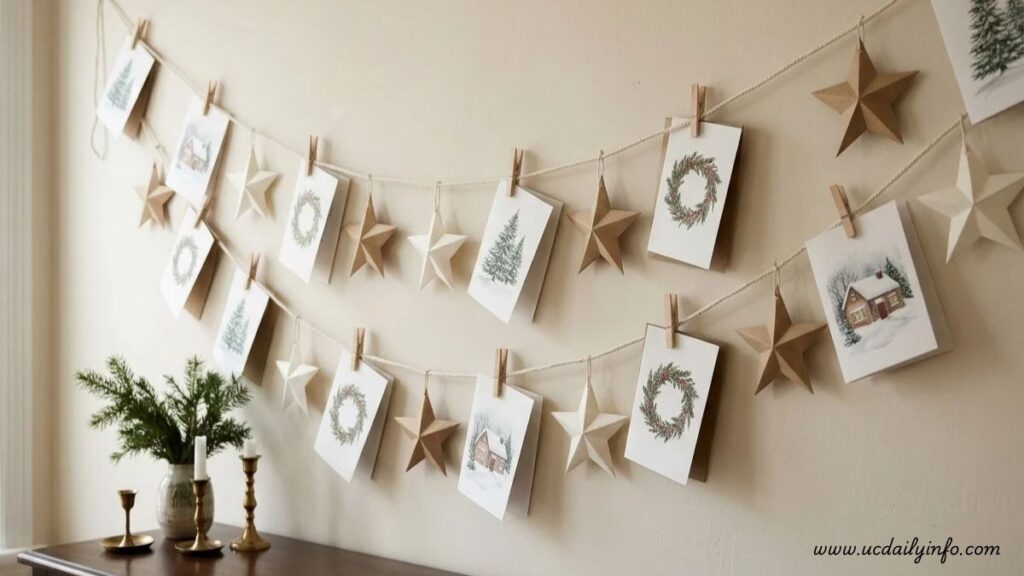
A card garland turns the greetings you receive into part of your Christmas decorating. It’s also easy to update as new envelopes arrive.
You’ll need: Cotton cord or ribbon, miniature clothespins, paper stars, and suitable wall hooks.
Hang the cord between two secure points with a gentle dip in the middle. Clip cards along it, alternating larger and smaller designs to balance the display.
Add a few paper stars wherever there are gaps. Position the garland where cards won’t brush against heaters, candles, or a busy doorway.
14. Christmas Rock Painting
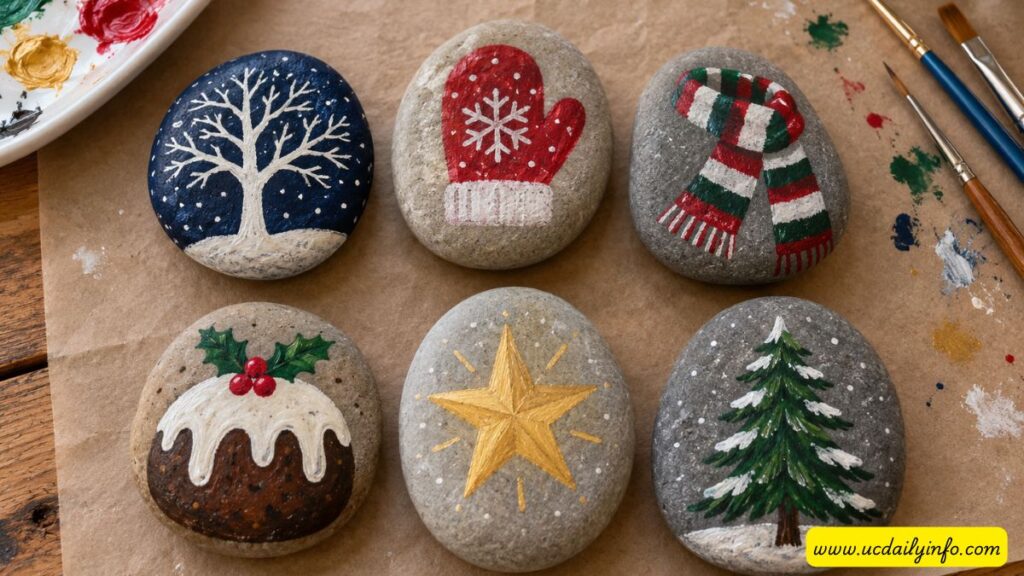
Painted rocks make cheerful little decorations for a desk, entryway tray, or potted plant display.
You’ll need: Smooth, legally sourced craft stones, acrylic paint, brushes, and paint pens.
Wash the stones and let them dry thoroughly. Paint a base color, then add a simple design such as a mitten, Christmas pudding, striped scarf, or tiny tree.
Allow each layer to dry before adding details. A dark background with a cream tree silhouette is a good starting point if you prefer a more understated finish.
15. Ribbon Scrap Tree Ornaments
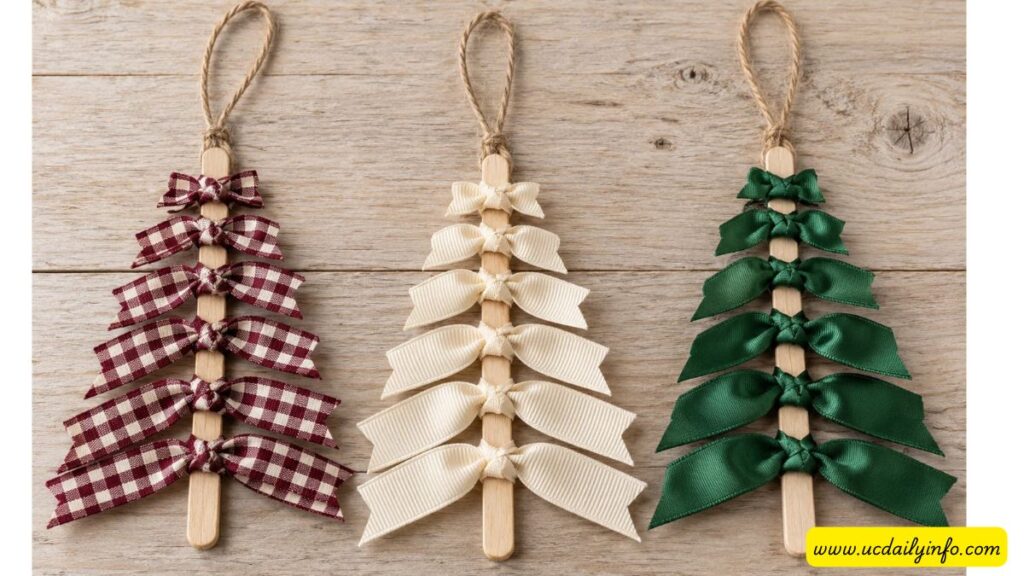
This project turns short pieces of ribbon into miniature trees with a pleasantly relaxed shape.
You’ll need: Clean, dry twigs or craft sticks, ribbon scraps, scissors, and hanging cord.
Tie ribbon pieces around the stick, placing the knots close together. Use longer pieces at the bottom and shorter ones toward the top.
Trim the outer edges into a tree outline and attach a hanging loop. Keep the ribbon knots facing the same direction for a tidier finish. A mixture of satin, gingham, and grosgrain adds texture without needing extra embellishments.
16. Personalized Christmas Place Cards
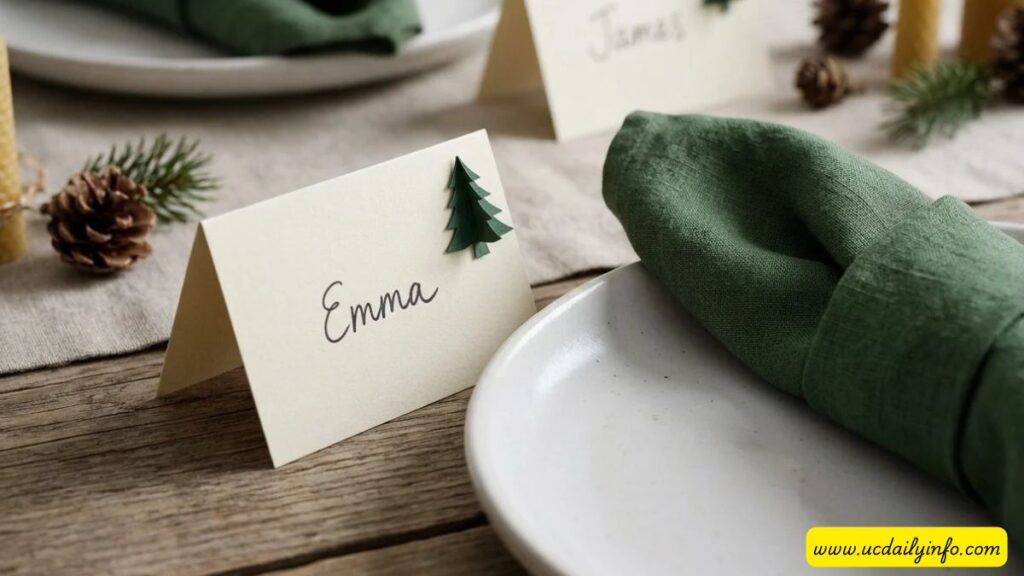
Handmade place cards make a holiday meal feel thoughtfully arranged, even if the table setting is otherwise simple.
You’ll need: Cardstock, a ruler, scissors, a pen, and small paper decorations.
Cut the cardstock into rectangles and fold each one into a tent. Write the guest’s name on the front, then add a small paper tree, star, or strip of patterned paper.
Keep decorations away from the bottom edge so the card stands properly. Repeat the same design across the table for a coordinated look.
17. Felt Holly Napkin Rings
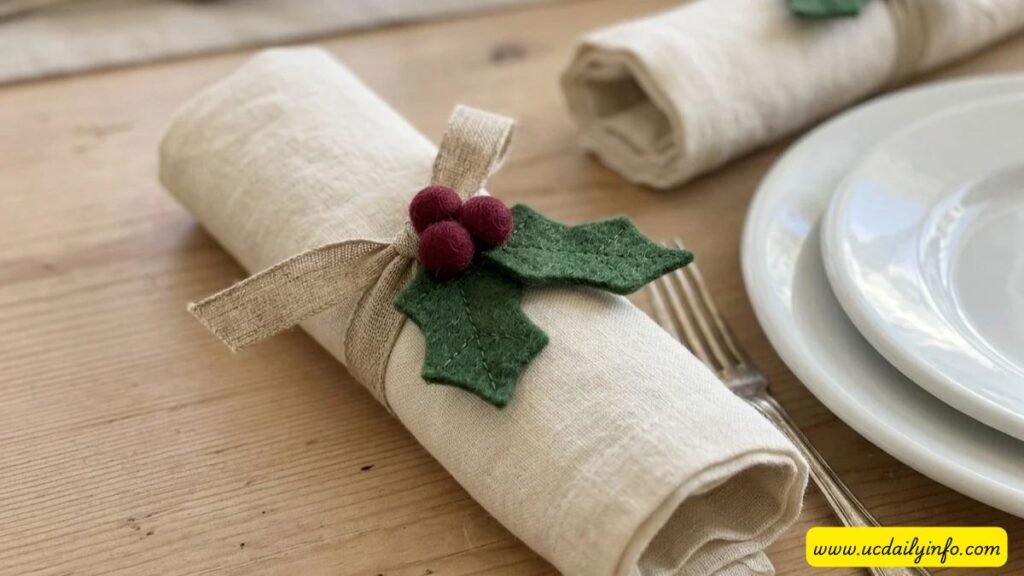
Felt holly brings a seasonal detail to plain cloth napkins. Deep green leaves and burgundy berries look festive without needing glitter.
You’ll need: Felt, ribbon, fabric glue, scissors, and red embroidery floss or small felt circles.
Cut two or three holly leaves for each setting. Arrange them on the center of a ribbon strip and glue them securely in place.
Add the berries and let everything dry. Wrap the ribbon around a rolled napkin and tie it at the back. Keep the decorations on the outside, clear of plates and food.
18. Book-Page Paper Baubles
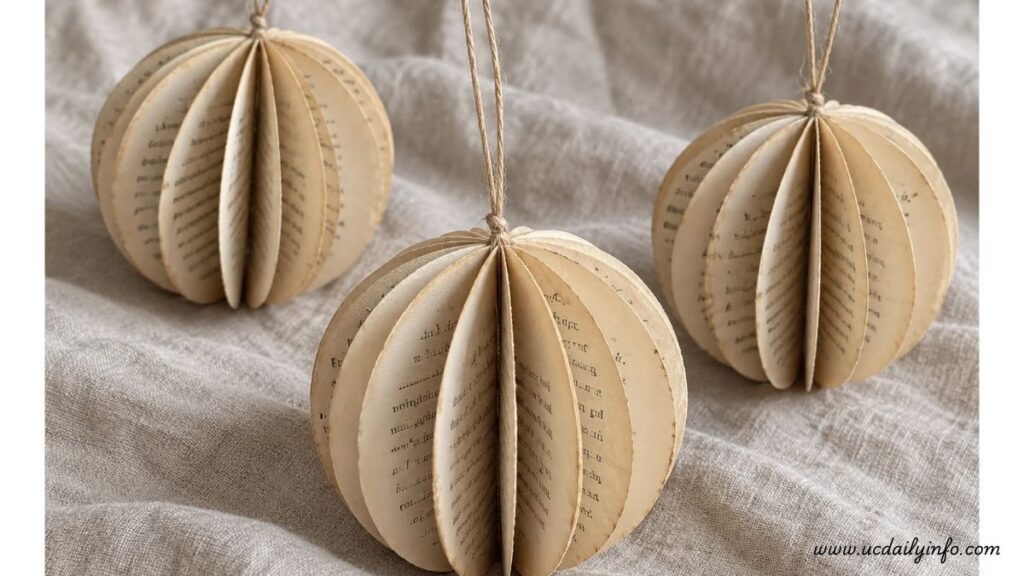
Old book pages or sheet-music copies give paper ornaments a soft, vintage look. Use damaged pages or printed reproductions rather than cutting up a book you still enjoy.
You’ll need: Paper, a circular template, scissors, glue, and hanging thread.
Cut eight matching circles and fold each in half. Glue one half of a circle to the next, continuing until you have a stack.
Place a knotted hanging loop along the center fold, then glue the first and last halves together. Open the sections gently to create a rounded bauble.
19. Tiny Christmas Cross-Stitch Hoops
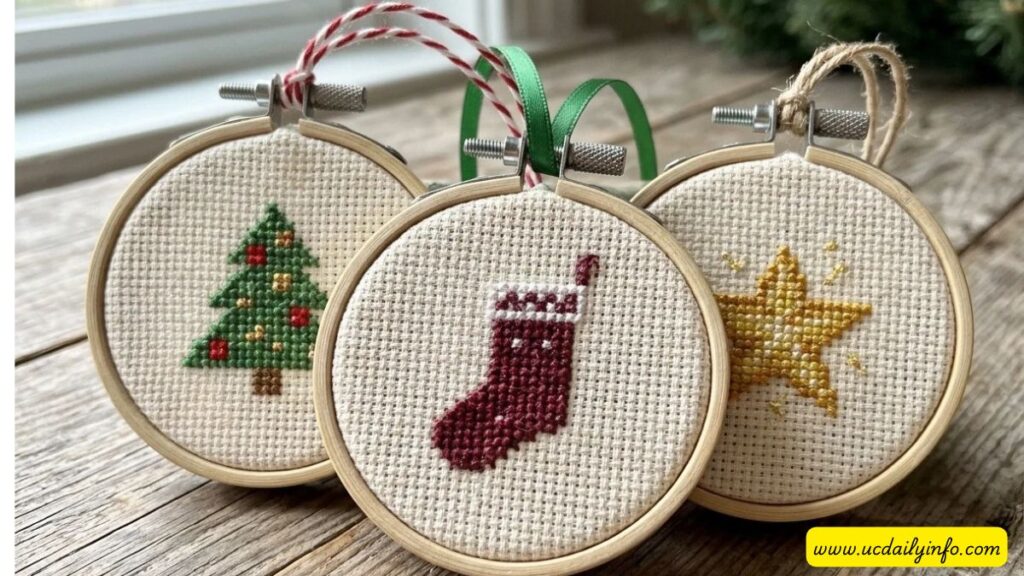
A small cross-stitch design is a satisfying choice when you’d rather settle into a quiet evening project.
You’ll need: A small embroidery hoop, Aida cloth, embroidery floss, a needle, and a beginner pattern.
Choose a simple motif such as a tree, stocking, or star, using an original or properly licensed pattern. Center the fabric in the hoop and complete the design.
Trim the excess fabric and secure it at the back. Finish with a ribbon loop. Limiting the design to two or three thread colors keeps the first attempt manageable.
20. Gingerbread-Style Cardboard Houses
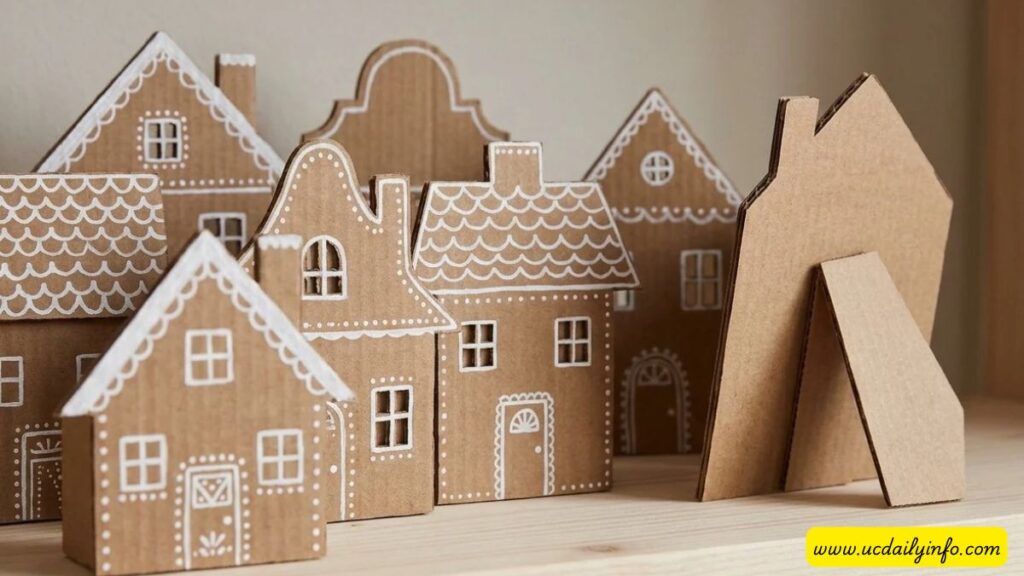
Recycled cardboard can become a charming little village without a single batch of icing.
You’ll need: Clean cardboard, scissors, a white paint pen, craft glue, and a pencil.
Sketch house fronts with different rooflines, then cut them out. Draw windows, scalloped roof edges, and little dots to suggest piped icing.
For freestanding houses, glue a folded cardboard support behind each one. Group them on a shelf, or punch holes near the rooftops and turn them into a garland. Keep the brown cardboard visible—it supplies the gingerbread color for you.
21. Christmas Fabric Gift Bags
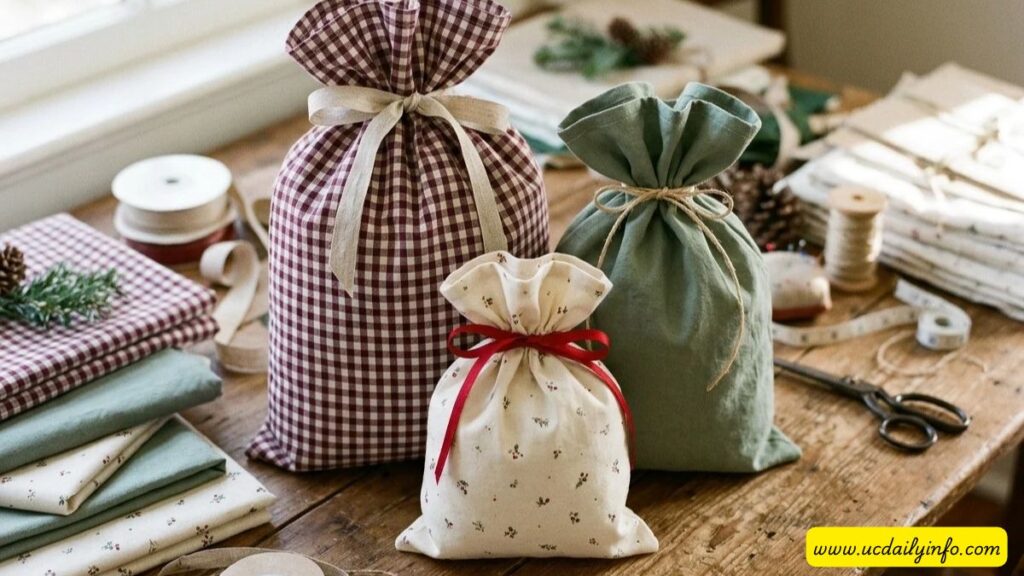
Reusable fabric bags are useful for wrapping books, candles, or small boxed presents. Choose cotton in a festive print or a solid color that works beyond Christmas.
You’ll need: Cotton fabric, scissors, thread, a needle or sewing machine, and ribbon.
Measure around the widest part of the gift and add about 2 inches for seam allowances and ease; use this as your fabric width. For the length, measure from beneath the gift to your intended ribbon tie point, allowing space to gather the opening. Double that measurement and add 1 inch for the hems. Check the fit before cutting.
Hem the two short ends. Fold the rectangle in half so the hemmed edges meet, with the right sides facing inward. Sew the side seams with a ½-inch allowance, leaving the hemmed top open.
Turn the bag right side out, place the gift inside, and tie the opening with ribbon.
22. Painted Nutcracker Peg Dolls

Wooden peg dolls make a smaller, simpler version of traditional nutcracker decorations. A little patience with the paint gives them plenty of character.
You’ll need: Wooden peg dolls, acrylic paint, fine brushes, and a pencil.
Sketch the placement of the face, jacket, belt, and boots. Paint the larger areas first, allowing each color to dry before adding neighboring details.
Finish with simple eyes, buttons, and a hat. Paint several in a coordinated palette, giving each one a different jacket. Display them together on a shelf rather than scattering them around the room.
23. No-Sew Christmas Bunting
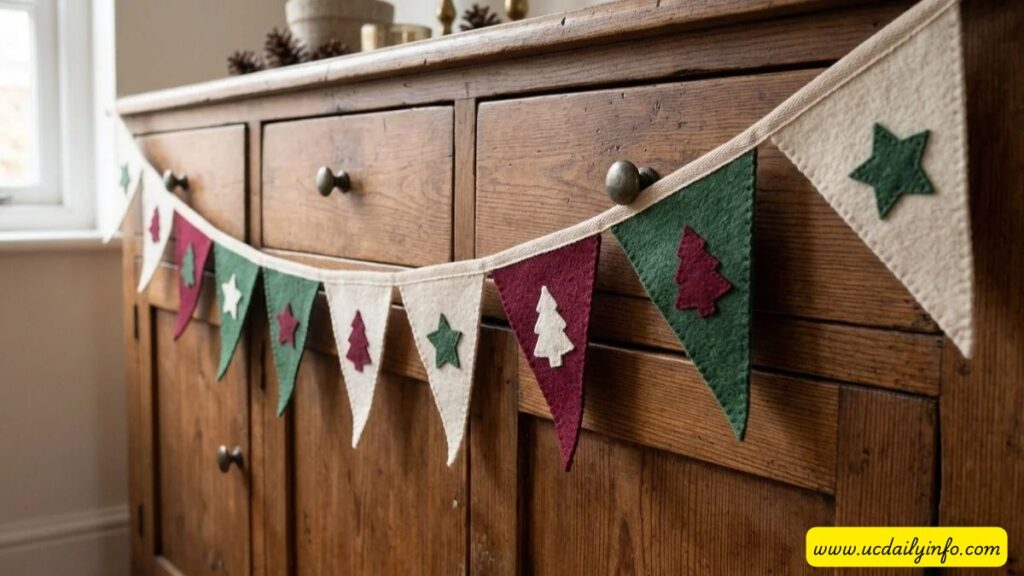
Bunting is a useful way to decorate a wall or sideboard when floor space is limited.
You’ll need: Felt sheets, ribbon, fabric glue, scissors, and a paper template.
Make a triangle template and cut matching flags from the felt. Decorate a few with simple stars or tree shapes, leaving the others plain.
Glue the flags along a length of ribbon with equal gaps between them. Leave enough ribbon at each end for hanging. Alternating cream, burgundy, and green creates a festive pattern without needing lettering.
24. Handmade Christmas Cards
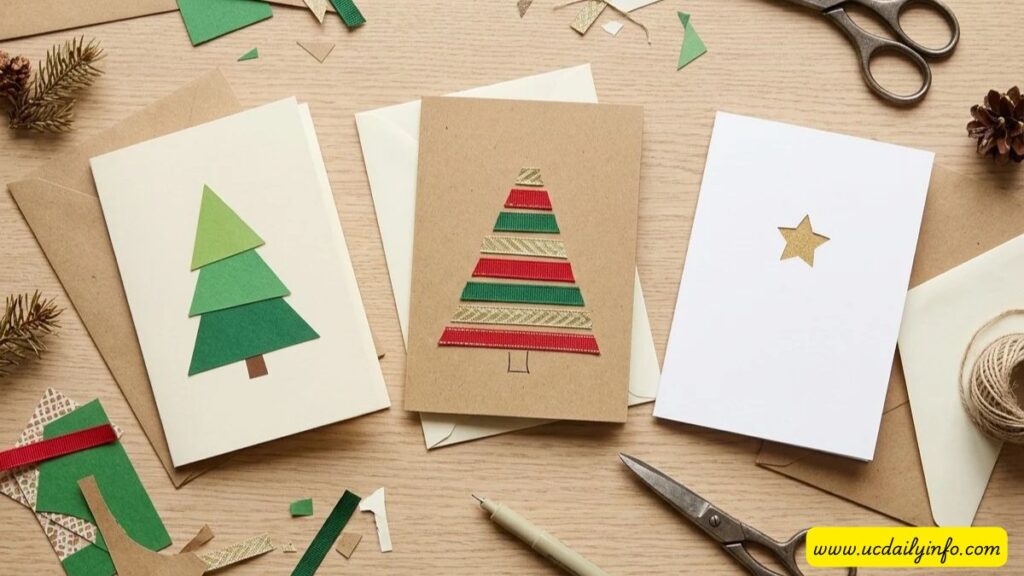
A handmade card doesn’t need a complicated scene to feel special. One carefully placed detail can be enough.
You’ll need: Blank cards, colored paper, glue, a fine pen, and ribbon scraps.
Cut three small triangles and layer them into a tree on the front of a card. Add a tiny paper trunk and a short handwritten greeting.
Try a different version with narrow ribbon strips arranged into a tree shape. Check that the glue is fully dry before closing the card, and keep decorations fairly flat if you plan to mail it.
25. A Christmas Memory Box
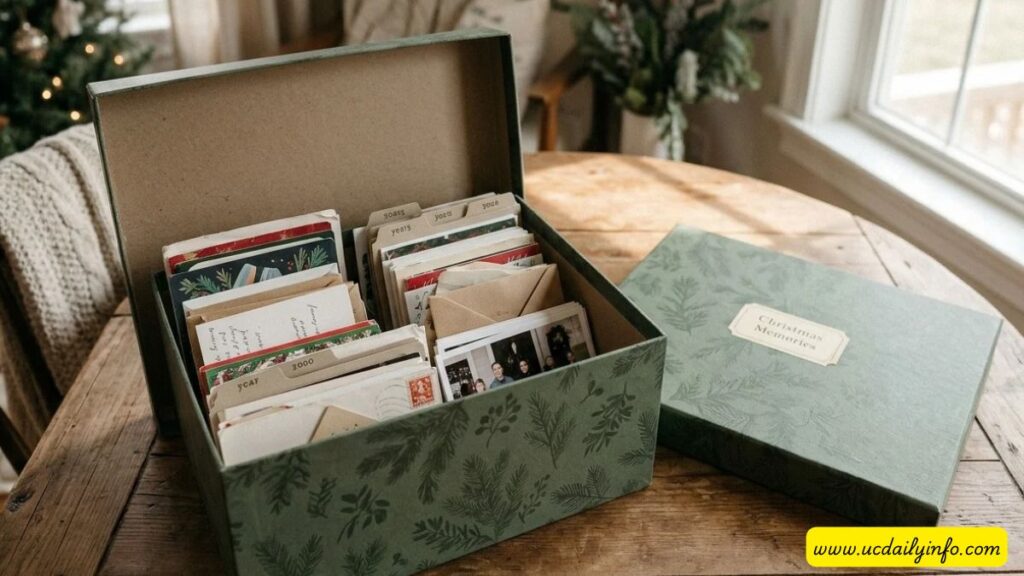
A decorated memory box gives the season’s small keepsakes somewhere to go after the decorations come down.
You’ll need: A sturdy lidded box, decorative paper, glue, cardstock, and a pen.
Cover the outside with paper, smoothing it carefully around the corners. Add a label with the year and your family name, then make a few cardstock dividers for photographs, cards, and written memories.
During the holidays, tuck in small notes about moments you want to remember. Leave out food, fresh greenery, and anything damp. Next December, opening the box can become part of the decorating tradition.
Make a Craft Night of It
For a Christmas craft night with friends, choose one main project and prepare a finished example so everyone can see what they’re making. Ribbon trees, cards, and wooden bead wreaths are convenient choices because supplies can be shared.
Set out materials in small bowls and provide a clear workspace for each person. Have a separate place for drying pieces, especially if you’re painting.
If you want to practice a particular technique before gathering supplies, Hobbycraft’s Christmas craft ideas include additional project guides for cards, decorations, and other seasonal makes.
Frequently Asked Questions
What are some easy Christmas crafts for adults who are beginners?
Velvet ribbon ornaments, painted gift wrap, ribbon scrap trees, and simple Christmas cards are approachable starting points. They use a small number of materials and let you adjust the design as you work.
What Christmas crafts can I make with supplies at home?
Try cardboard gingerbread houses, paper trees, a holiday card garland, or a Christmas memory box. Clean packaging, leftover ribbon, and plain paper can provide most of the materials.
Which handmade Christmas crafts work well as gifts?
Personalized clay tags, felt ornaments, small cross-stitch hoops, and fabric gift bags make thoughtful choices. Choose colors or initials that suit the recipient, and let painted or glued pieces dry fully before wrapping them.
Can I make Christmas decorations without a hot-glue gun?
Yes. Many of these projects use craft glue, fabric glue, stitching, or wire. Choose an adhesive suited to the materials and allow the recommended drying time.
How should I store handmade Christmas decorations?
Store decorations only when they’re clean and fully dry. Cushion fragile pieces, keep paper decorations flat where possible, and place fabric ornaments in a dry container. Label the box so delicate pieces don’t end up beneath heavier decorations.
A Little Handmade Goes a Long Way
You don’t need to make all 25 projects to give your home a personal Christmas touch. A few bows on the tree, handmade cards for friends, or a little cardboard village can be plenty.
Start with the craft you’re most curious about and use colors you enjoy. The finished piece can have a slightly uneven edge and still deserve a place in your Christmas decorations.